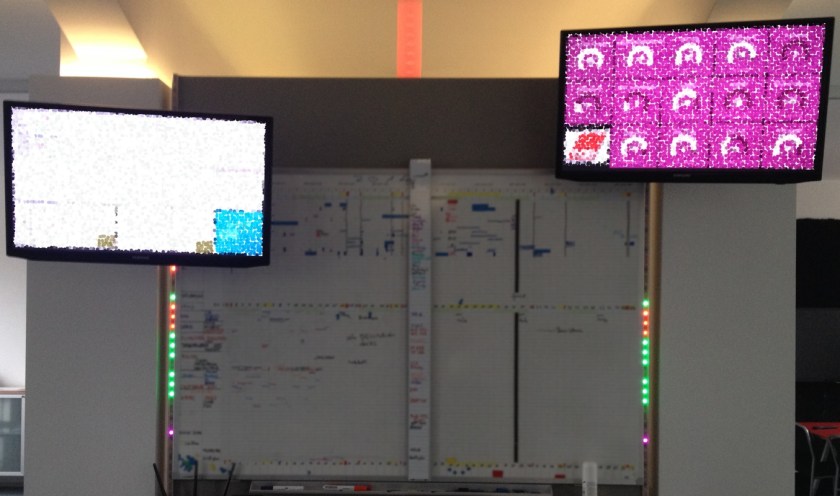
We are using a Jenkins server to test our projects continuously. To make the results clearly visible, my colleagues installed a Raspberry Pi to display the testing results on a huge LED strip. As you see in the picture below, the project results are displayed on both sides of the whiteboard. The aggregated result is displayed in the big LED tube on the top.
This setup was built in 2012, but this year we started to work remotely, i.e. from home. Therefore we have no access to informations which are physically displayed at the office. Some month ago, Daniel Havlik mouthed the idea to build an LED strip “to go”. Since the decreased visibility annoyed me, I was a strong advocate of his idea.
Finally, during the Summer Sprint we held in September, we had the opportunity to work on a project of our choice. Daniel Havlik supplied us with an Arduino Uno and a small LED strip, so we started to work on his idea together with a friend of mine, Oliver Zscheyge.
During the first day, we built a simplistic API for the Arduino to set the color of an LED by providing position and color. To test the API we wrote a small Python script that sent random colors to all LEDs.
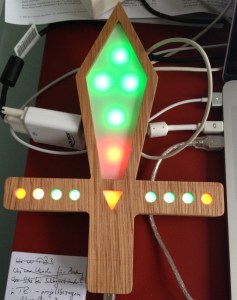
At the second day of the sprint, Daniel astonished us, since he had put in some extra hours during the night to build a prototype. It had a wooden frame, colored in black and all. Wow! This was definitely the most “visible” result of the Summer Sprint.

Later that day, we extended the Python script to retrieve the project states from Jenkins and set the LEDs accordingly. We used an INI-file to define which LED represents which project. For fun we also played a short sound when a project was working and broke or the other way around.
Since one of my co-workers wanted to move back to his home town, he got the prototype. To speak truly, I was a little bit jealous about that. But to my surprise, Daniel built another “LED to go” and gave it to me in October, as a birthday present. Since I am a LARPer, I love the shape of it which resembles a sword.
At some days I like to pronounce that “my sword of Jenkins power is glowing green”, which casts a smile on the faces of my co-workers. I think this was a great project with a very useful result.
If you possess some crafting abilities, you can easily make an “LED to go” yourself. We made our code public at bitbucket/remoteled. It contains the versatile API for the Arduino, as well as the Python script which retrieves data from a Jenkins server. Of course you can build additional clients for your personal needs. If you think it’s useful to others as well, send us a pull request. We are looking forward to it!
With these words I am wishing you all a Merry Christmas and a Happy New Year, since I will not write another post in 2014. See you in January!